Here is what that project is made of: Blue insulation foam, sawdust, acrylic wall paint, clear epoxy resin, elmers glue, steel wool, liquid nails, green polyester fiber fill, foam powder, and various plant parts. These are all easily accessible things. the green polyester fiber fill and foam powder are available at any hobby store.
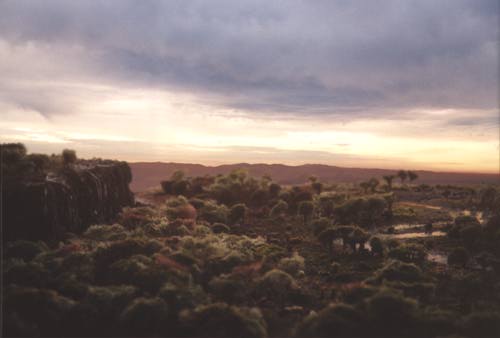
The small trees are made of steel wool. I would just pull off a smal bit of it and make it puffy on one end, and twist it tightly on the other. I would then spray brown paint over it to give the trunk its color. Next I would spray some spray glue over that and sprinkle the foam powder overtop. Bigger trees were dead flowers that I found in the center divider of a street in town. They are a type of flower that has multiple ?flowerlets? on each stem. I would just strech some of the green polyester over that and then apply the foam powder in the same way that I did for the steel wool trees.
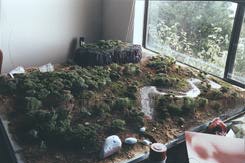
The land itself is just blue insulative foam that can be bought in 4x8 foot sheets at any builders supply place or lumber yard possibly. It is easily carved and is great for all kinds of prototyping applications. Overtop of the foam I sprinkled the sawdust and then sprayed a mixture of elmers glue and water over that. Be prepared for this to take a long time to dry (days)
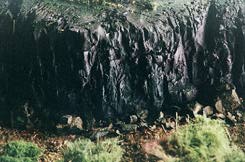
The plateau is another chunk of the blue foam. Cut it to the rough shape that you are looking for and then go at it with an exacto knife in a way that would make any vilian from a horror movie smile with admiration. DO NOT carefully cut things in an exacting manner as that will look fake. To make that look like rock, go out and buy some acrylic wall paint (flat). I bought some of the base and also some of the colors that they mix with it so that I could mix small quantitys of different colors by myself. You should probably buy some premixed black acrylic paint also. Acrylic artists paint in the tubes is apparently not the same stuff and I did not have luck using that.
Mix up some paint to the color that you would like the base color of the rock to be. put a nice thick coat of this over the foam so that no blue shows through. Let this dry. Next mix up a batch of the black paint so that it is really thin. Brush this over the foam. Don't worry about most of it running off. What you are trying to do here is make the cracks and crevices darker and to give it a weathered look. Just cover the whole thing, and let it go where it chooses. Let that dry. Now, you can add some final touches by drybrushing hints of lighter colors over this in small areas. Dry brushing is where you dip your brush in paint and then get almost all of the paint back out of it by brushing it off on a piece of scrap. When almost no paint is coming off ot the brush, you are ready to drybrush.


Here is my other project for this class. It was made by a technique my teacher calls 'kit bashing'. This is where you take parts from all kinds of other kits and combine them into something different. The back is make from a Star Trek Voyager engine, the belly is (I believe) part of a submarine, the feet are part of helicopter rotors, the rear knee joints are 1955 Bel Air hubcaps. I put it together using a solvent called Weld-on.

Finally, this is a little extra project that I am working on. It is a combination of a 1955 Bel Air, and a 1967 Corvette. This was put together using Weld-on again and also some glasing putty.
|